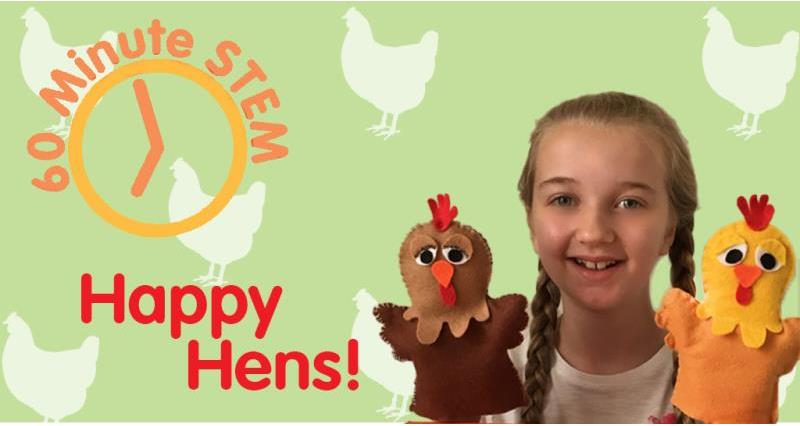
Farmvention offers three engaging problem-solving tasks that promise to inspire children to learn about the Science, Technology, Engineering and Mathematics (STEM) involved in food and farming. See www.farmvention.com for full details and teaching materials linked to the challenges.
One of the challenges asks children to design a living environment for a flock of 100 laying hens. To help your children get started on entering the competition, we have been thinking about what chickens need to be happy and healthy and designed some simple STEM activities that you could complete with your child or class in under 60 minutes.
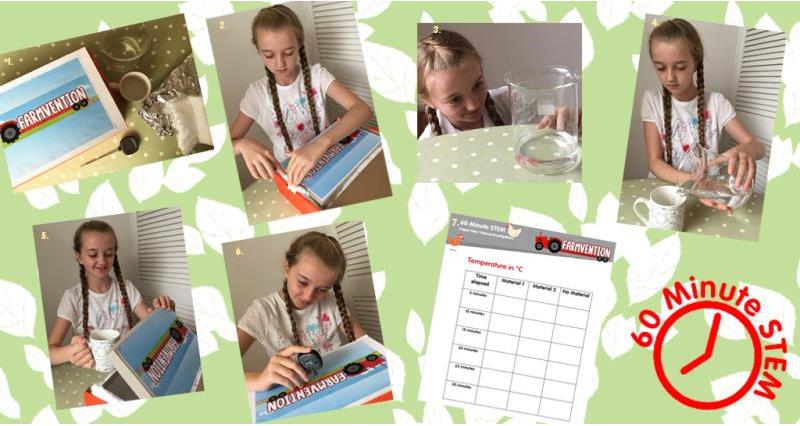
Science investigation: which material will keep a hen house homely (not too hot or too cold)?
In this investigation, which is closely linked to the National Curriculum for Science at both Key Stage 1 and 2, we explore a range of materials and consider their effectiveness as insulators for a hen house. Plenty of opportunities for scientific discussions are built in and children are encouraged to work scientifically by predicting which material will be the most effective, taking accurate measurements and thinking about ways to extend their investigation. This could be a great place to start when your young Farmventors are planning their hen house design for the competition.
You will need:
- Two shoe boxes of different sizes
- A measuring jug or beaker
- A thermometer or food temperature probe
- At least two types of materials to use to insulate your box. You could use bubble wrap, cotton wool, aluminium foil, fabric, scrunched up tissue paper, newspaper, hay etc.
- A mug
- A timer
- A table of results
What to do:
- Choose at least two materials to investigate. Make a prediction: which material do you think will keep the chicken house cosy for longer? Why?
- Place the smaller shoe box inside the larger one and fill the gap between the walls of the boxes with one of your insulating materials. Make sure that there are no little gaps!
- Place the lid on both of the boxes and poke a small hole through them using your temperature probe or a skewer (adult supervision required).
- Boil some water and measure 200ml using your measuring jug. Pour it into the mug (adult supervision required).
- Carefully, place the mug of boiling water inside the smaller box.
- Take the temperature of the mug of water and record your result in your table.
- Replace the lid of both boxes and set the timer for 5 minutes.
- After 5 minutes, re-set the timer for another 5 minutes and poke the temperature probe through the hole in the lids and into the water to measure the temperature.
- Record the temperatures in your table.
- Complete steps 8 and 9 every five minutes for half an hour.
- Repeat the investigation, keeping everything the same but changing your insulating material (Don’t forget to use some new boiling water!)
Key stage 2 children: you might like to draw a line graph to display your results.
Why not make a poultry puppet pal in between taking your temperature readings? Scroll down for more instructions!
Extension:
You might like to extend your investigation in the follow ways:
- Continue to take temperature readings for an hour
- Test more materials
- Repeat the investigation using no insulating material. What will this tell us?
Let’s Talk Science!
Look at your results. Can you describe what they show: did your temperature go up or down? Did you predict that this would happen? Can you explain why this happened? Which material do you think would be the best choice to keep your hen house warm for longer?
Key stage 2: materials have lots of different properties which make them useful for different jobs. One example of a property of materials is insulation. Some materials are good insulators of heat. This means that they do not allow heat to pass through them very easily. When designing a cosy hen home, we need to choose a material that is a good insulator so that the heat does not escape from the house, leaving the chickens chilly! Look at your results: which material was the best insulator? How can you tell?
Think about your current box design: what could you do to make it even more insulated?
Your final hen house design needs to be large enough to house 100 hens. How might a larger hen home affect your results?
Don’t forget, in your final hen house design, you must also think about the other things a hen needs to be healthy and happy:
- The right diet and access to fresh water
- To have shelter from bad weather
- To be protected from predators
Why not design your own investigation to explore one of these ideas further?
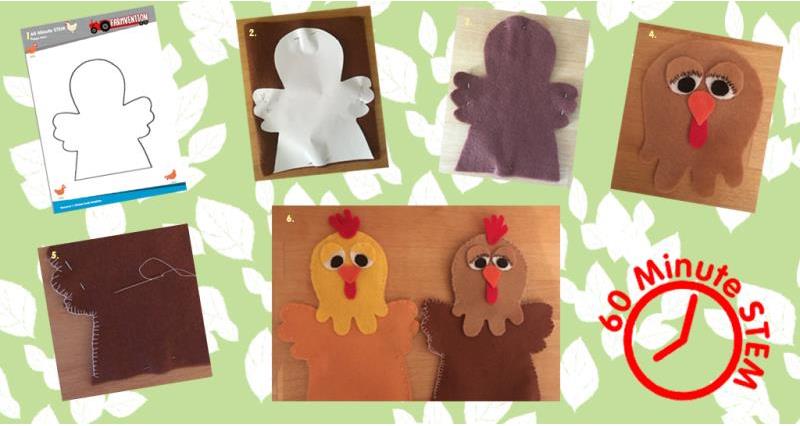
Design & Technology activity: make a poultry puppet pal!
In this activity, which links closely to the National Curriculum for Design and Technology, we show children how to make a chicken hand puppet using simple sewing techniques- the perfect activity to keep them busy on a rainy day while teaching them some technology skills! If your child chooses to make a video to advertise their hen house design for the Farmvention competition, their new poultry puppet pal could also be used as a presenter!
What you need:
- Puppet templates (body template, face template)
- Felt in a range of colours (your chicken can be any colour you like!)
- Pins
- Cotton thread
- A needle
- Scissors
- Feathers and buttons to decorate (optional)
- Glue (optional)
What to do:
- Draw and label your puppet design. Remember to label where you will add decoration and which type of stitching you wish to use.
- Print and cut out the puppet template pieces (body template, face template).
- Pin your template to your felt sheet.
- Draw around the template and onto the felt sheet.
- Carefully, cut out the felt shapes. Remember to cut out the body piece twice so you have a front and a back for your puppet.
- Thread the needle with the cotton (ask an adult for help!)
- Sew or glue the smaller pieces of felt onto one of the head piece to make your chicken’s eyes, beak, wattle and comb.
- Pin your head piece, front of body and back of body pieces together.
- Use running stitch or blanket stitch to sew the three pieces of felt together. Remember to leave the bottom open so you can use it as a puppet!
- Tie a knot at the end of your thread.
- Decorate your puppet pal!
Let's Talk Technology!
Look at your puppet pal. Does it look like your original design or did you decide to make some changes as you went along? Did you use running or blanket stitch or a mixture of both? Can you fit your hand inside to make your puppet move? What would you do differently next time?
Now you have your own Poultry Puppet Pal! Why don’t you interview her to find out what a hen needs for a happy home? You might even like to use your puppet in your promotional video for your final hen house design!
For more information on our Farmvention competition, please visit www.farmvention.com
Send us a photo of your poultry puppet pal and tell us all about your science investigation at ZWR1Y2F0aW9uQG5mdS5vcmcudWs= or @NFUEducation!
Links to the National Curriculum
SCIENCE INVESTIGATION | |
Subject and Topic | National Curriculum Links |
Key Stage 1 Science: Working scientifically |
|
Key Stage 1 Science: Year 1 Everyday materials |
|
Key Stage 1 Science: Year 2 Uses of everyday materials |
|
Lower key stage 2 Science: Working scientifically |
|
Upper key stage 2 Science: Working scientifically |
|
Key Stage 2 Science: Year 5 Properties and changes of materials |
|
DESIGN & TECHNOLOGY ACTIVITY | |
Subject and Topic | National Curriculum Links |
Key Stage 1: DT Design |
|
Key Stage 1: DT Make |
|
Key Stage 1: DT Evaluate | Evaluate their ideas and products against design criteria |
Key Stage 2: DT Design | Generate, develop, model and communicate their ideas through discussion, annotated sketches, cross-sectional and exploded diagrams, prototypes, pattern pieces and computer-aided design |
Key Stage 2: DT Make | Select from and use a wider range of materials and components, including construction materials, textiles and ingredients, according to their functional properties and aesthetic qualities |
Key Stage 2: DT Evaluate | Evaluate their ideas and products against their own design criteria and consider the views of others to improve their work |